Showing posts with label Indian. Show all posts

August 14, 2013

Shrimp Biryani


Grace, one of our talented non-blogging Daring Kitchen members, was our Daring Cooks' August hostess who shared with us some of her family's tried and true Bengali Biryani recipes -- all of them delicious and all of them prepared fresh from our own kitchens!

I've said it before. Rice strikes the fear of God in me. I know the formula: one part rice to two parts water. But I've had enough undercooked and overcooked rice (not to mention two destroyed rice cookers) to know that that formula is by no means foolproof. 

So you can imagine my apprehension when I saw that this month's Daring Cooks' Challenge was biryani. I grew up eating biryani. It's an Indian dish of rice, layered with a tasty meat or vegetable mixture, strewn with fried onions and potatoes.

It's a special occasion dish. It takes time. And effort. And skill. Because you don't just cook everything and layer it. No. You cook the rice partway through. Then you layer it with your meat or veggies. Then you cover it tightly and steam it until the rice is just cooked through and the flavors of the curry permeate the entire dish.

Done right it's a sight to behold and a pleasure to eat. Done wrong, it's a travesty. 

Due to my (aforementioned) fear of rice, I'd never attempted biryani. Good thing Daring Cooks is around to kick my butt.

As expected, the most difficult part — for me — was the rice. The recipe called for the rice to be boiled until it was three-quarters of the way cooked. What? How are you supposed to judge that? Not to mention, I'd mistakenly thought I had basmati rice in my pantry. I was wrong. I substituted a different long grain rice. But that meant I couldn't even fall back on the recipe for guidance on cooking time.

In the end, the biryani was a bit of a miss, but mostly a hit. In an effort not to undercook the rice, I steamed the final, layered mixture for too long. That left me with a hard, dry layer of rice on the bottom and part way up the sides of my pan. But when we scooped around the hardened crust, what remained was a flavorful mixture of tangy, spicy shrimp, mixed with fragrant rice and bits of fried onion and potato scattered throughout.


Marinate shrimp in turmeric, chili powder, ginger garlic paste and lemon juice. Refrigerate for a few hours or up to overnight.


Soak rice in cold water .


And start heating the water for cooking the rice. Adding salt, bay leaf, cardamom, cloves and cinnamon to the boiling water results in wonderfully fragrant rice.


Now prepare the shrimp masala. Start by sauteeing cardamom, cloves, cinnamon and bay leaf in hot oil until fragrant.


Add onions and cook down until deep golden brown. Add ginger garlic paste and saute for a minute.


Add tomatoes and cook until completely cooked down and disintegrated. Mix in salt, chili powder and turmeric.


Add shrimp and saute until just cooked through. Sprinkle in lemon juice. Turn off heat and set aside.


Prepare the garnishes. Start by cooking sliced onion in oil until crisp and golden brown.


In the same oil, cook potatoes until crisp and golden brown.


Drain soaked rice.


Slowly add rice to boiling water.


Boil for about 7 minutes, until about 3/4 cooked. Drain and remove whole spices.


Now it's time to layer the biryani! Spread a bit of oil on the bottom of a large pot. Add 1/3 of the rice and spread over the bottom of the pot.


Top with half of the shrimp mixture. If you have some extra fried onion and potatoes, sprinkle a bit of those on top of the shrimp. Repeat with another 1/3 of the rice, then the remaining shrimp, then the remaining rice. Sprinkle onion and potato garnish over top.


Cover the pot tightly with aluminum foil. Then place a cover on top. Steam over medium-low flame for about 30 minutes. It's best to put a flat pan on top of the flame, then put the pot on top of that. (I didn't do that and ended up with a hard bottom crust of rice.)


Remove cover and aluminum foil and behold!


Dig in carefully, straight through to the bottom and admire your carefully layered biryani.


Enjoy!


Shrimp Biryani


Shrimp Marinade:
1 lb shrimp, peeled and deveined
1 tsp ginger garlic paste
1 tsp red chilli powder (or to taste)
1/2 tsp turmeric
1 tsp lemon juice

Shrimp Masala:
1 1-inch piece cinnamon stick
2 cardamom pods
2 whole cloves
1 bay leaf
3 Tbsp canola oil
2 onions, chopped
1 tsp ginger garlic paste
2 tomatoes, chopped
1/2 tsp red chili powder
1/2 tsp turmeric
1 tsp salt
marinated shrimp
1 tsp lemon juice

Rice:
2 1/2 cups long grain rice
1 tsp oil
1 tsp salt
2 cloves
2 cardamom pods
1 1-inch piece cinnamon stick
1 bay leaf

Garnishes:
1 onion, sliced thin
1 potato, sliced into thin rectangles


Marinate shrimp:
1.    Marinate shrimp with ginger garlic paste, chili powder, turmeric and lemon juice for a few hours or up to overnight.


Prepare the shrimp masala:
1.    Heat oil in a saute pan. Add the cinnamon, cloves, cardamom and fry for a few minutes until fragrant.

2.    Add the onion and cook until they are dark golden brown.

3.    Add ginger garlic paste and saute well.

4.    Add tomatoes and cook down until all of the moisture is gone and the tomatoes have disintegrated.

5.    Add the turmeric, chili powder and salt.

6.    Add the shrimp and saute until the shrimp are just cooked through. Add the lemon juice and mix.

7.    Turn off the heat and set aside.


Prepare the rice:
1.    Soak the rice in a bowl filled with plenty of cold water for 30 minutes.

2.    Fill a large pot 3/4 full with water. Add oil, cinnamon, cardamom, cloves, bay leaf and salt. Bring to a boil.

3.    Drain rice, then add it slowly to the boiling water. Cook for about 7 minutes, until it is 3/4 cooked.

4.    Drain the rice. Remove the whole spices.


Garnishes:
1.    Shallow- or deep-fry onion until golden brown and crispy. Remove to a paper-towel covered plate. Sprinkle with salt.

2.    Repeat for potato.


Layer and steam biryani:
1.    Take a large (preferably nonstick) pot. Spread a tiny bit of oil on the bottom. Add 1/3 of the rice and spread it evening across the bottom of the pot.

2.    Top with half of the shrimp and tomato/onion mixture. If you have enough fried onions and potatoes, you can scatter a bit of those on top of the shrimp.

3.    Top with another layer of rice and then shrimp. Then top with the final layer of rice.

4.    Sprinkle the remaining fried onions and potatoes on top.

5.    Cover the top of the pot with a piece of aluminum foil. Tightly seal the edges so that no steam escapes. Put a cover on top of the foil.

6.    Place a flat pan on top of the stove, then put your pot on top of the pan (this helps prevent the rice from crisping).

7.    Heat over medium-low heat for about 30 minutes.


Serves 6

March 8, 2013

Mattar Paneer


Kosha was my first friend. Our mothers met as recent immigrants from India, living in the same apartment complex. I still remember holding Kosha's hand at Peach Tree preschool, as we played together in the pretend house. We consulted each other on all major decisions like whether she should ask for Lite Brite or dress up high heels for her birthday. We started kindergarten together, best friends. And then her family moved to the other side of town. For a seven year old, it felt like the other side of the planet.

Years later, we ended up at the same middle school. It was as if no time had passed. We jumped right back into our friendship, spending entire afternoons on the phone, doors locked against intruders (or little sisters). There were important things to discuss. How we were going to pass chemistry, who was dating who, what we were going to wear to the semiformal. And, the times when we were feeling particularly thoughtful, we talked about what our futures might hold.

Like most childhood friends, we were over at each other's houses all the time. When my mom came to pick me up, she and Kosha's mom would catch up over a hot cup of masala chai. My mom relished the chance to sit down and chat with an old friend.

Nearly three four decades later, Kosha and I are still the best of friends. We're close to the age now that our mothers were back when we were in middle school.

Looking back, I'm amazed at how much they accomplished, with so little help and so far from home. Kosha's mom worked full time, just like mine. My mom cooked dinner in the evenings, after work. So it always intrigued me that Kosha's mom finished all of her cooking early in the morning, before work.

you can find pre-fried frozen paneer
at any Indian grocery store
Kosha's family is strict vegetarian. When I stayed over for dinner, I always hoped for (and often requested) mattar paneer, a tasty dish of peas in a fragrant and flavorful curry, strewn with pieces of mild Indian cheese. I've tried to recreate it here. It's good. But not as good the mattar paneer I grew up eating at my best friend's house.


Cook paneer until golden brown. If using pre-fried, frozen paneer, as I did, then just defrost.


Gather your whole spices.


And ground spices.


Stir fry bay leaf, cloves, cardamom and cinnamon stick in hot oil.


Add ground cumin, chili powder, turmeric, coriander and garam masala.


Add a bit of water, and stir fry for a couple of minutes.


Add ginger and let it cook for a minute.


Then add peas and paneer.


Give everything a good stir until the peas and paneer are coated in the spices.


Then add water.


Cover and simmer until the peas are cooked, the paneer is heated through, and the gravy thickens a bit.


Serve hot with chapatti or over rice.


Mattar Paneer


2/3 cup canola oil (reduce the amount if using pre-fried paneer, as I did)
1 lb paneer, cut into cubes
1 bay leaf
4 cloves
2 black cardamom pods
1 cinnamon stick, about 1 inch long
1 tsp ground cumin
1 tsp chili powder
1/2 tsp ground turmeric
2 tsp ground coriander
1 tsp garam masala
1 1-inch piece of fresh ginger, peeled and chopped or grated
1 2/3 cup peas (I used frozen)
salt, to taste


1.    Heat the oil in deep skillet over medium heat. Add the paneer and fry for about 5 minutes, until golden brown all over. Remove with a slotted spoon and drain on paper towels. (I used pre-fried frozen paneer, so I skipped this step.)

2.    Reheat the oil in the same pan, add the bay leaf and whole spices and fry for about 1 minute, or until they are fragrant and change color.

3.    Add the ground spices. Season with salt and pour in 4 tablespoons of water. Stir-fry over medium heat for 2 minutes.

4.    Add the ginger. Stir for a minute. Then add paneer, peas, and 2 1/4 cups water. Bring to a boil. Reduce heat, cover, then simmer for 5 to 7 minutes, or until the peas are cooked. Adjust the seasoning, if needed.


Serves 4 to 6


July 23, 2012

Indian-style Bell Peppers with Chickpea Flour


The other day I was making daal and rice for dinner. While that seemed perfectly acceptable to me, I kept hearing my mom's voice in my head, saying "You can't serve just daal and rice. At least make a vegetable!" So I opened my produce drawer. Two bell peppers. One red. One green. Each left over from something I had planned to make, but obviously never did.

chickpea flour
Bell peppers aren't something I normally cook Indian-style, so I wasn't sure what to do with them. I opened up India: The Cookbook, an encyclopedia of Indian cooking. And I found a recipe that required just two ingredients (besides the spices I always have in my pantry): bell peppers and chickpea flour.

Chickpea flour may sound unusual. But if you've ever eaten at an Indian restaurant, you've probably tried it. It's the flour that's used to coat the fried fritters known as pakoras. In Indian stores, chickpea flour is usually labeled as either "gram flour" or "besan." It's delicious. It's nutritious. And it's gluten-free. 


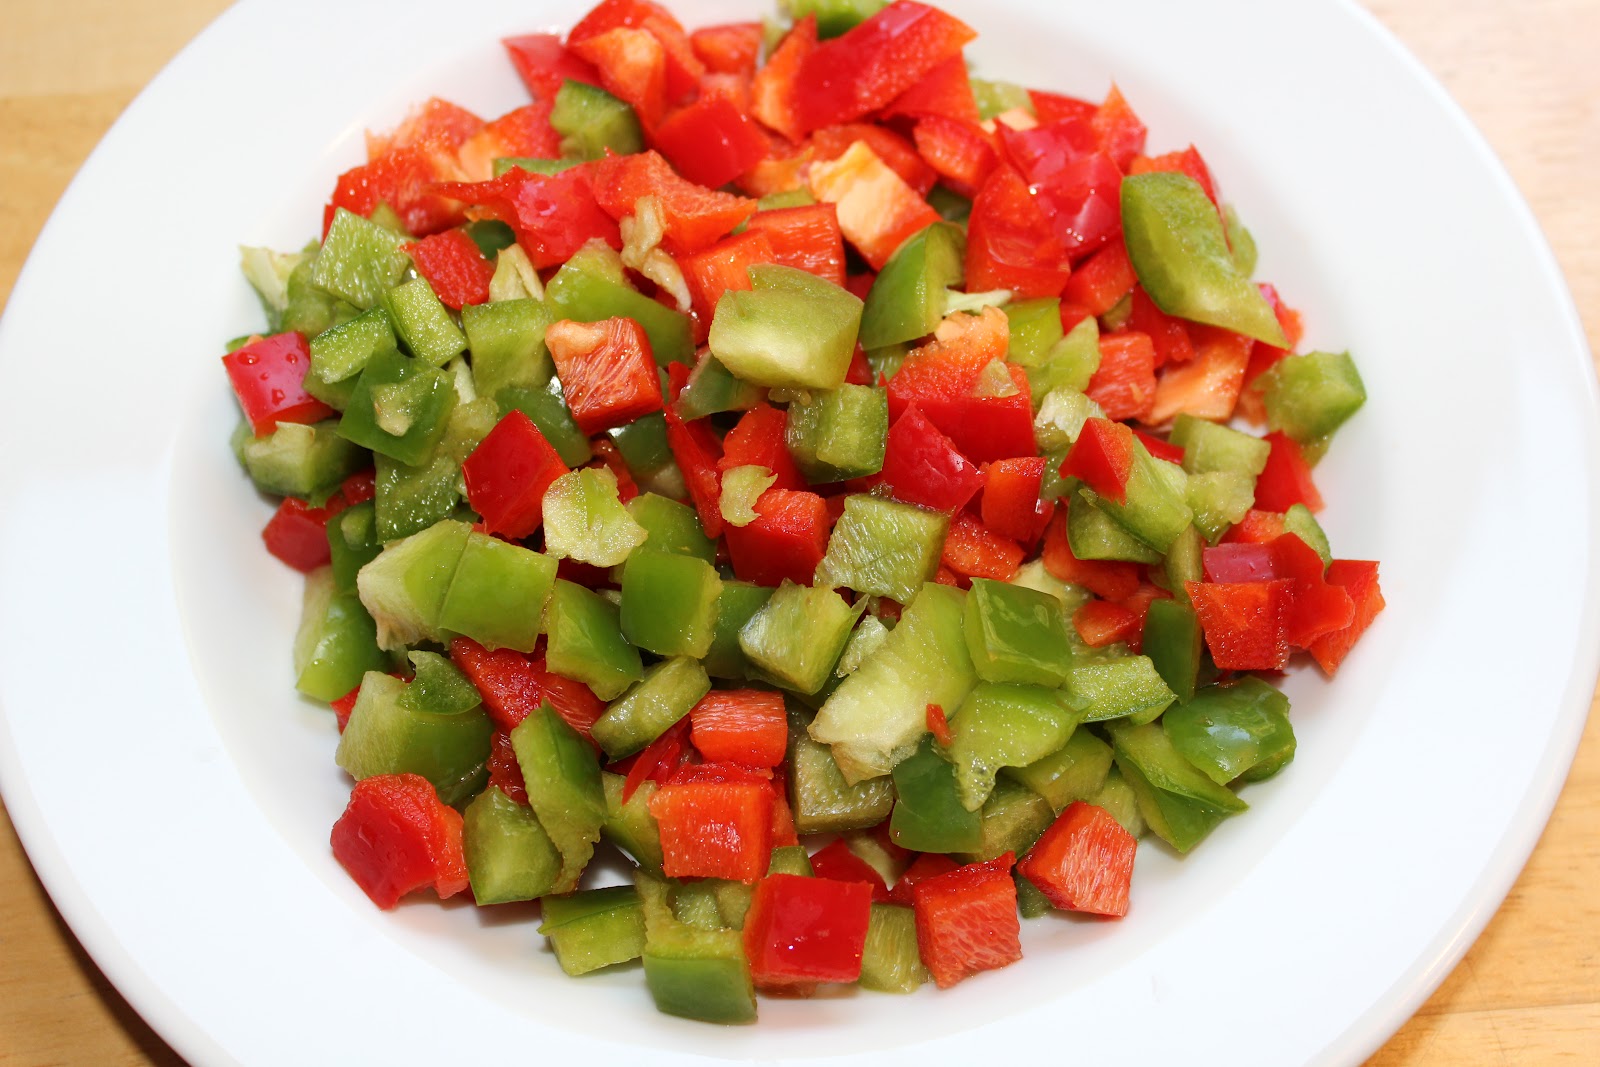
Dice up the bell peppers.


Place chickpea flour in a bowl.


Add chili powder, some of the turmeric, sugar and salt. Mix together.


Heat oil in a saucepan. When it's hot, add asafetida and mustard seeds. When the mustard seeds start popping, add the rest of the turmeric. Heat for another minute.


Add the bell peppers and stir fry until they're half tender. It's not easy to tell when something is half-tender. I should have let mine cook a little longer. 


When the peppers are half cooked, add the chickpea flour. Stir to coat the bell peppers in the flour.


Cook for another five minutes or so until the peppers are tender and the flour has turned golden brown. When it's properly cooked, the flour will also lose it's "raw" smell.


Serve with flatbread or alongside daal and rice.


Indian-style Bell Peppers with Chickpea Flour

Recipe very slightly adapted from India: The Cookbook

1 1/2 cups chickpea flour
3 tsp chili powder
1 1/2 tsp ground turmeric
1 tsp sugar
2 Tbsp vegetable oil
3 tsp mustard seeds
1/2 tsp asafetida
6 bell peppers, cored, deseeded, and cut into small pieces
salt

1.    Put the chickpea flour, chili powder, 1/2 teaspoon turmeric, salt to taste and sugar in a bowl. Mix together.

2.    Heat the oil in a deep, heavy pan over medium heat. When the oil is hot, add the asafetida and mustard seeds. When the seeds begin to pop, add the remaining turmeric. Stir fry for 1 minute.

3.    Add the peppers and cook over high heat for a few minutes until they are half-tender.

4.    Reduce the heat to medium and add the chickpea flour mixture. Mix well until the peppers are well coated with the flour.

5.    Cook for another 5 minutes or so until the peppers are tender and the flour is golden brown.


Serves 6


May 17, 2012

Tandoori Chicken Naan Pizza


Tandoori chicken naan pizza. This is pizza that gives you real bang for your bite. Pillowy naan, spicy chicken, sharp onion, sweet mango, and salty cheese.

Patak's tandoori paste
And the best part is, with just a little bit of advance prep, you can put the pizza together in less than 30 minutes. The night before, cut up and marinate the chicken. The next day, quickly saute the chicken. Then put it on the naan along with the onion, cheese and mango.

Mango and chicken on pizza might sound a little strange. But it's no stranger than a ham and pineapple pizza, right? I think it's delicious. But if you're not convinced, leave it out. Or substitute it with something else -- cilantro, bell pepper, scallions, whatever sounds good to you.


Mix together yogurt and tandoori paste.


Combine with cubed chicken breast. Refrigerate overnight.


The next day, saute the chicken until it's just cooked through. Don't worry if it's saucy -- this will become your pizza sauce.


Place the chicken, along with the tandoori sauce it cooked in, on the naan. My naan heats up in just 3 minutes, so I put the chicken on still-frozen naan. If your naan takes several minutes to heat, then you might want to heat it a little first, then add the toppings.


Put some sliced red onion on top of the chicken.


Add some sliced mango.


Top with shredded cheese.


Bake until the cheese melts and starts to bubble.


Enjoy!


Tandoori Chicken Naan Pizza

Recipe adapted from Bev Cooks

2 chicken breasts, cut into a small dice
3 Tbsp plain Greek yogurt
2 tsp (or more) tandoori paste
1 Tbsp olive oil
1/2 red onion, thinly sliced
1/2 mango, cut into small pieces (or use frozen mango that's been thawed and sliced)
2 store bought naan breads
1 cup shredded mozzarella cheese

1.    In a bowl, stir together the yogurt and tandoori paste. Add the chicken. Cover and marinate at least an hour or overnight.

2.    Preheat oven to 400°F.

3.    Heat oil in a skillet over medium-high heat. Add the chicken to the pan with the marinade. Saute until chicken is cooked through and the sauce reduces a little, about 6 minutes. Remove from heat.

4.    Layer the chicken and sauce over each naan. Top with sliced red onions and sliced mango. Then top with shredded cheese.

5.    Place in the oven and bake 10 to 12 minutes, until the cheese has melted and is bubbly.


Makes 4 pizzas